

Pet freshening workflow: Safe, odor-free homes
TL;DR:
- A proper pet odor removal routine depends on thorough saturation, dwell time, and extraction to eliminate the source. Using pet-safe products, tools, and safety precautions ensures effective cleaning without risking your pets’ health. Consistent prevention strategies and addressing behavioral triggers help maintain a fresh, odor-free home long-term.
If you’ve scrubbed the same spot three times and still catch a whiff when you walk in the door, you’re not alone. A solid pet freshening workflow is the difference between actually eliminating odors and just delaying them. Most pet parents try hard but skip critical steps, like proper saturation or dwell time, and the smell always comes back. This guide walks you through every step, from gathering the right tools to preventing future accidents, with safety for your pets and family front and center the whole way through.
Table of Contents
- What you need: Tools and safety essentials
- Step-by-step pet freshening workflow
- Common mistakes and troubleshooting
- Sanitizing and safe disinfection post-cleanup
- Odor prevention: Workflow meets behavior management
- Why most pet odor fixes fail — and what actually works
- Safe, effective odor solutions for pet homes
- Frequently asked questions
Key Takeaways
| Point | Details |
|---|---|
| Safety comes first | Never mix cleaning products, always choose pet-safe cleaners, and follow label instructions for a safe home. |
| Workflow matters | Odor removal requires blotting, enzyme saturation, proper dwell time, thorough extraction, and full drying. |
| Avoid steam mistakes | Do not use heat or steam until odors are gone; improper timing can set stains and worsen odors. |
| Prevention is key | Combine regular cleaning with behavior management like frequent potty breaks to keep odors from recurring. |
| Disinfection is optional | Disinfect safely after cleaning and drying, using EPA-registered products that are appropriate for pets. |
What you need: Tools and safety essentials
Before tackling odors, make sure you have everything you need for a safe and effective workflow.
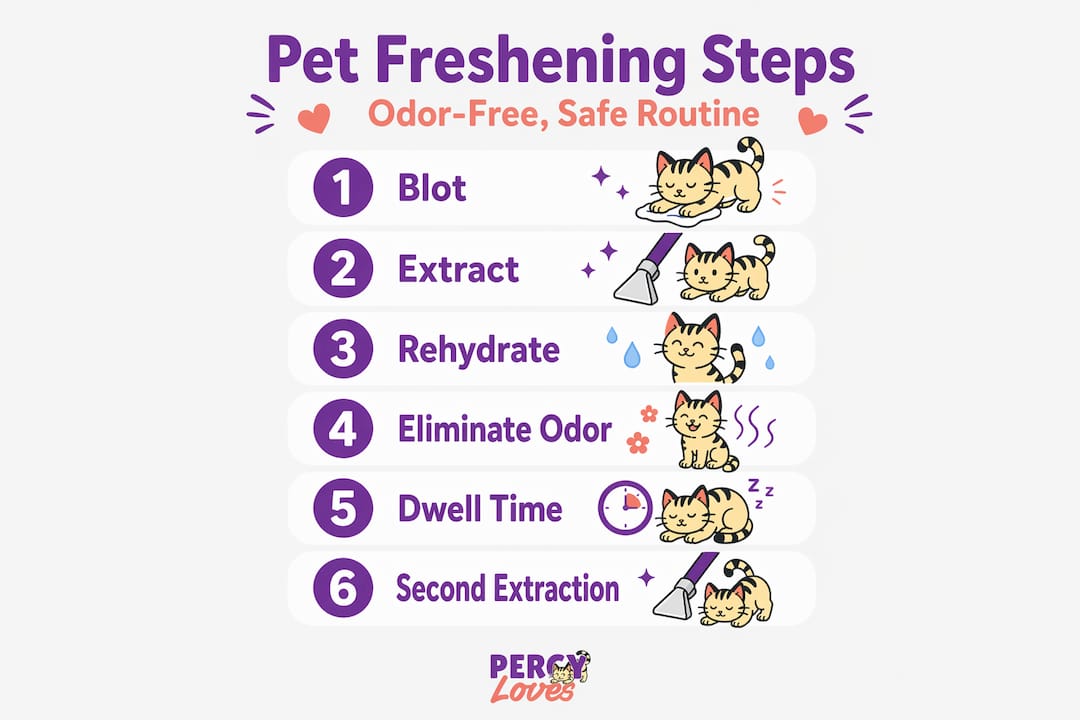
Getting the tools right matters as much as the technique. Rushing in with the wrong products can make odors worse or, more seriously, put your pets at risk. Here’s what to have on hand before you start.
Essential supplies:
- Absorbent white cloths or paper towels (for blotting)
- A wet/dry vacuum or carpet extractor
- A spray bottle for applying cleaner
- Rubber gloves
- A face mask if you’re sensitive to strong smells
- Baking soda (optional, for light deodorizing between cleanings)
- A pet-safe odor eliminator, fragrance-free and enzyme-free like Pal Furresher
- Natural pet treats to reward your pet after the cleanup is done
A word on product safety:
The CDC is clear: never mix cleaning products with each other. Mixing bleach with ammonia-based cleaners, for example, creates toxic fumes. Always read labels. Always.
Safety first: Keep pets out of the area during cleaning and until all surfaces are fully dry. Even products labeled “pet-safe” need time to dry before your fur baby goes back to sniffing around.
Check out these pet-safe cleaning tips and learn how to protect pets from chemicals before you get started.
Step-by-step pet freshening workflow
Once you’re ready to start cleaning, follow these steps for reliable, safe odor removal.
This is the core of your pet hygiene routine. Each step builds on the last, so skipping one tends to undo the ones before it.
1. Blot immediately, don’t rub. Use a clean cloth or paper towels to absorb as much liquid as possible. Press down firmly. Rubbing spreads the stain deeper into fibers.
2. Extract the excess. If you have a wet/dry vacuum, use it now. The more liquid you pull out before applying any product, the better your results.
3. Rehydrate dried stains (optional but effective). For older spots, lightly dampen the area with cool water first. This helps loosen dried urine crystals so your cleaner can actually reach them.
4. Apply your odor eliminator generously. The product needs to reach the padding beneath carpet, not just the surface fibers. Saturate the area. A light mist won’t cut it for anything beyond a surface-level smell. A good safe cleaning guide will tell you the same thing.
5. Allow proper dwell time. Keep the area damp during this phase. If it dries out too fast, the product stops working. Cover loosely with a cloth if needed.
6. Extract again and dry completely. Use your wet/dry vacuum to pull out the treated liquid. Then let the area air dry fully, ideally with a fan or open window. Rushing this step is one of the most common reasons odors return.
7. Check your results after drying. Odors can hide until the area is completely dry. Don’t declare victory too soon. Do a final sniff test once everything is bone dry.
Important: Heat can set odors permanently when used before the odor is fully resolved. Skip the steam cleaner until you’ve confirmed the smell is gone.
Pro Tip: Use a blacklight (UV flashlight) in a darkened room to spot urine you can’t see with the naked eye. Pet urine glows under UV light, so you’ll know exactly where to focus your effort.
Here’s a quick reference for dwell times and coverage:
| Surface type | Recommended coverage | Minimum dwell time |
|---|---|---|
| Carpet (fresh stain) | Saturate to padding | 10 to 15 minutes |
| Carpet (dried stain) | Rehydrate, then saturate | 20 to 30 minutes |
| Hard floor | Generous coat, not pooling | 5 to 10 minutes |
| Upholstery | Saturate fabric layer | 10 to 15 minutes |
Use your pet-parent checklist to track each area you’ve treated.
Common mistakes and troubleshooting
Even with the right workflow, mistakes can undermine your results. Here’s how to avoid them and troubleshoot persistent issues.
The odor keeps coming back. This is the most common complaint. Odors return when the product didn’t reach the padding, dwell time was cut short, or extraction was incomplete. The fix is simple: go back and redo the step you rushed.
Not enough product. A light spray on the surface does almost nothing for carpet. The urine soaked all the way through, and your cleaner needs to do the same.
Letting the area dry mid-treatment. If your cleaner dries out before you extract it, you’ve essentially just added more residue to the problem. Keep it damp.
Using steam too soon. We can’t say this enough. Steam before odor removal is fully complete can bond residue to fibers and make the smell nearly impossible to remove later.
Skipping the second extraction. Most people blot once and walk away. The second extraction after dwell time is where the real work happens. Don’t skip it.
Pro Tip: For high-traffic areas or spots where accidents happen repeatedly, consider using a UV light weekly to catch new spots early. Treating fresh stains is dramatically easier than treating dried, set-in ones.
Here are some quick fixes for common issues:
- Odor returns after drying: re-saturate and extend dwell time, then re-extract
- Stain reappears after carpet dries: the padding is still holding residue; treat from below if possible
- Surface smells fine but room still stinks: check nearby baseboards, walls, and furniture legs
For more guidance, see our clean home with dogs guide and the safe home checklist.
Sanitizing and safe disinfection post-cleanup
After odor removal and drying, you may want added disinfection for full peace of mind, especially on hard surfaces.
Disinfection is not the same as odor removal. They’re two separate steps, and doing them in the wrong order creates problems. Disinfecting before you’ve removed the odor source just traps it.
How to disinfect safely after cleanup:
- Wait until the area is fully dry after odor treatment
- Use an EPA-registered disinfectant and follow label directions exactly
- Never mix disinfectants with other cleaning products
- Allow the disinfected surface to dry completely before letting pets back into the area
- For soft surfaces like carpet, disinfection is generally not recommended unless a vet advises it
Good to know: The CDC recommends cleaning with soap and water before disinfecting. Disinfectants work best on surfaces that are already clean, not on surfaces with active residue or odor.
This two-step approach, clean first, then disinfect if needed, is the safest and most effective method for cleaning pet areas in your home. For more on keeping your space safe, read our dog safe home cleaning guide and our pet cleaning safety guide.
Odor prevention: Workflow meets behavior management
To keep your home fresh long-term, pair your cleaning workflow with smarter prevention and management strategies, especially in homes with multiple pets.

Pet scent removal is only half the battle. If the behavioral triggers stay in place, the accidents keep happening. And if the odor cues remain (even faint ones your nose misses), pets will return to the same spot.
Prevention strategies that actually work:
- Clean up accidents immediately. Every hour you wait makes the job harder.
- Use your UV light regularly to catch spots before they become problems.
- Increase potty break frequency, especially for puppies, seniors, or newly adopted pets.
- Reward good bathroom habits consistently. Positive reinforcement works.
- In multi-pet homes, pair your cleaning routine with behavioral adjustments to break the re-marking cycle.
For homes with rabbits, guinea pigs, ferrets, or other small animals, odor prevention looks a little different. Check out our small animal cleaning tips for species-specific guidance.
Pro Tip: If your dog keeps returning to the same spot, the odor cue is still there even if you can’t smell it. Dogs have a sense of smell roughly 10,000 times more sensitive than ours. Full saturation and proper extraction are the only ways to remove the signal entirely.
Grooming also plays a role. A well-maintained coat holds less odor. These prevention and grooming tips are a great starting point for dog freshening tips that go beyond the floor.
Why most pet odor fixes fail — and what actually works
Let’s step back and consider why so many odor solutions disappoint, and what you can do differently for real, lasting results.
Here’s the uncomfortable truth: most pet owners are solving the wrong problem. They’re treating the smell instead of the source. Perfumed sprays are the biggest offender. They layer fragrance on top of odor molecules that are still very much present. The smell seems gone. Then the fragrance fades. And the funk is back, exactly where you left it. Worse, many of those sprays contain ingredients that aren’t safe for pets who lick surfaces or breathe in concentrated fragrance.
Steam cleaners are another well-meaning mistake. Used at the right time, after odor is fully resolved, they’re fine. Used too soon, the heat bonds urine proteins to carpet fibers in a way that makes them nearly permanent. We’ve heard from pet parents who steam-cleaned a spot five times and couldn’t figure out why it kept getting worse.
The real game-changers are saturation, dwell time, and extraction. Not in isolation. All three, in sequence. This is what the effective cleaning guide is built around, and it’s what separates a workflow that works from one that just delays the problem.
Safety-first is not a marketing phrase. It’s the only approach that holds up over time. Products that are fragrance-free and enzyme-free, like Pal Furresher, eliminate odors at the source without adding new chemical concerns to your home. Your pets lick floors. They press their faces into cushions. The products you use in those spaces matter more than most people realize.
The humans at Percy Loves built Pal Furresher because Percy had a real funk problem, and we weren’t willing to solve it with something that might hurt him. That’s the standard every product in your best pet cleaning routine should meet.
Safe, effective odor solutions for pet homes
Ready for lasting freshness? Discover pet-safe solutions that align perfectly with the workflow outlined above.
If you’ve followed the steps in this guide, you already know that the right product makes every step more effective. That’s exactly why we created Pal Furresher, our fragrance-free, enzyme-free odor eliminator that tackles odors at the source the moment it makes contact. It’s lick-safe, non-toxic, and designed for homes where pets are family.
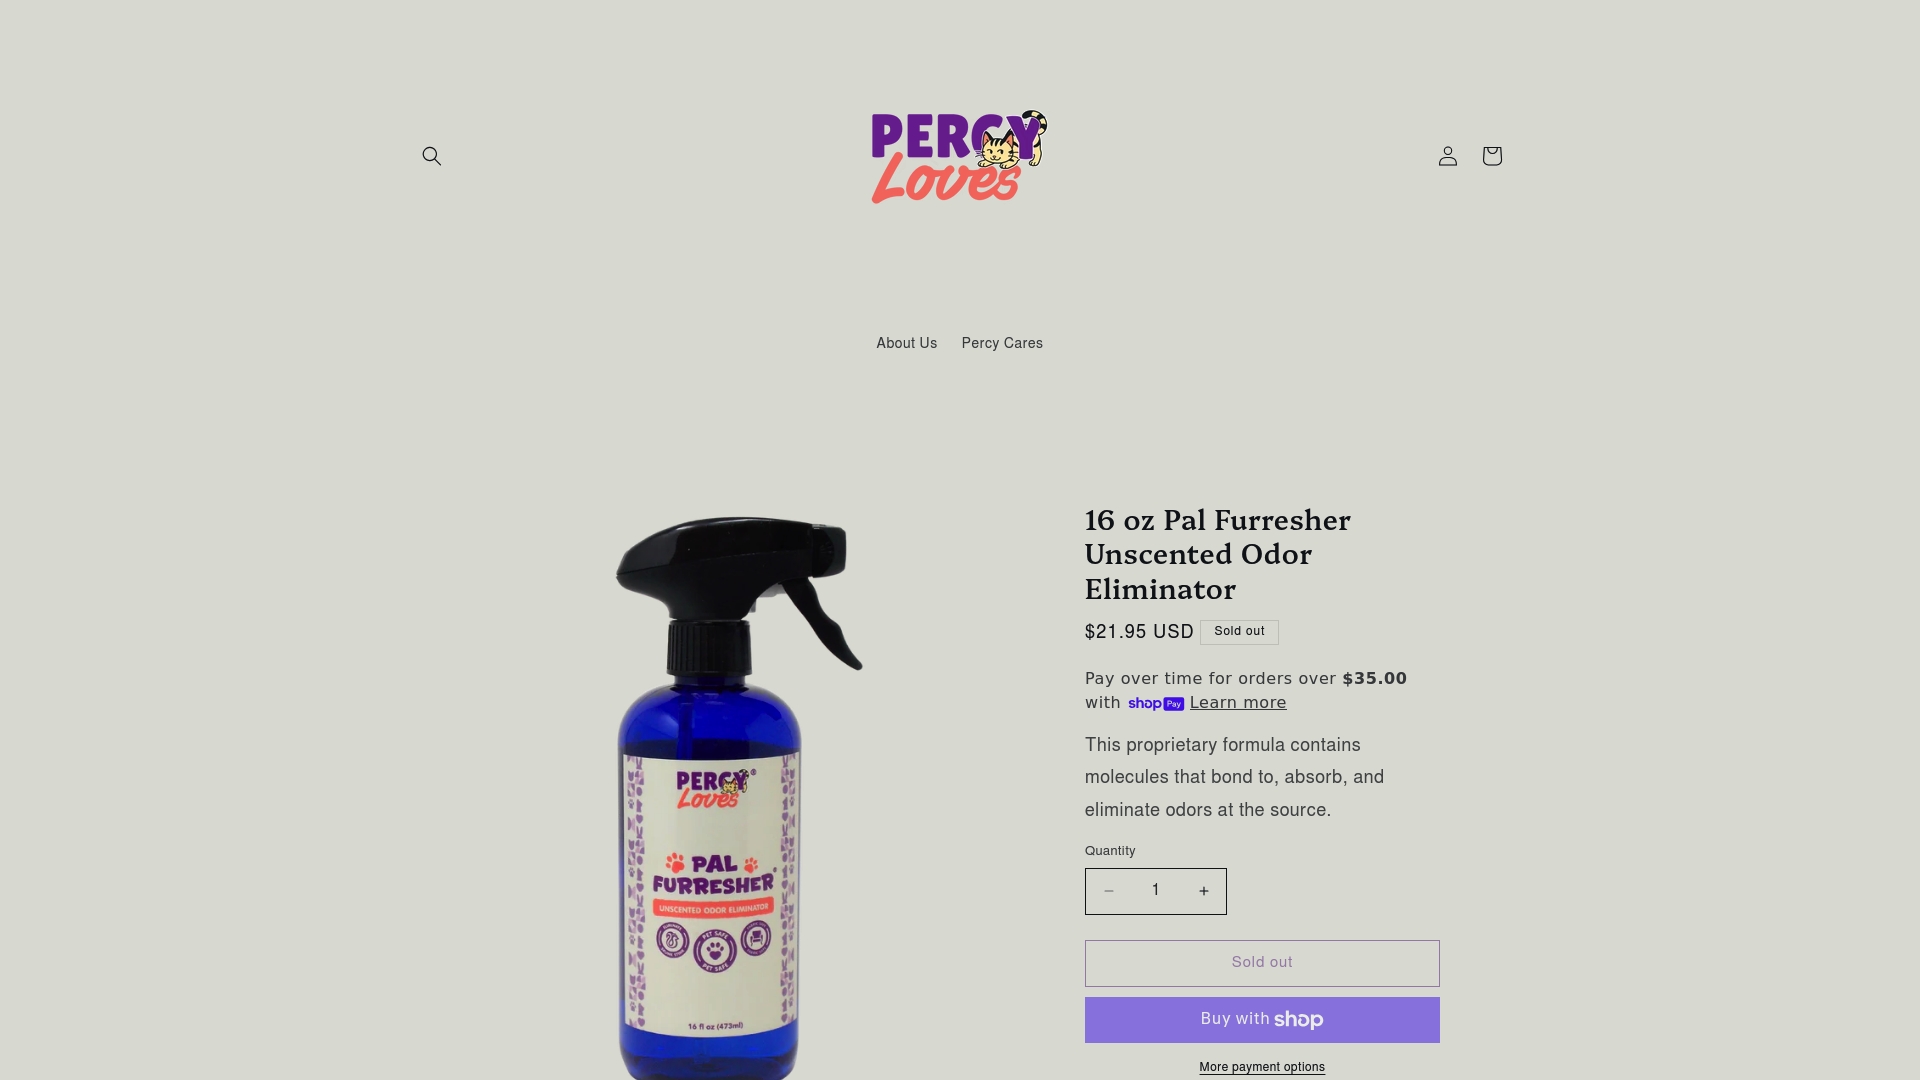
Whether you’re dealing with a fresh accident or a stubborn old stain, Pal Furresher fits right into your pet freshening workflow without adding harsh chemicals or overwhelming scents to your space. It comes in a convenient 4 oz and 16 oz bundle so you’re covered for quick spot treatments and bigger jobs. Explore the full range of pet-safe options at Percy Loves and find what works best for your home and your fur babies.
Frequently asked questions
How can I safely clean up pet urine without harming my pets?
Use a fragrance-free, enzyme-free odor eliminator, make sure it reaches the carpet padding, and never mix cleaning products with each other. Always follow label instructions and keep pets out of the area until it’s fully dry.
Why does pet odor keep coming back after cleaning?
Odors return most often because the cleaner didn’t fully saturate the padding, dwell time was cut short, or the area wasn’t properly extracted before drying. Redoing those steps with more product and more patience usually resolves it.
Should I disinfect after odor removal? Is it safe for pets?
Yes, but only after the area is clean and fully dry. Use an EPA-registered disinfectant, follow label directions, never mix it with other cleaners, and let the surface dry completely before pets return.
What’s the safest way to use steam cleaners with pet odors?
Wait until the odor is completely gone before using steam. Using heat too soon can bond urine proteins to carpet fibers and make the smell permanent.
How can I prevent pet odors from returning?
Pair prompt cleanup and a complete workflow with behavioral routines like frequent potty breaks and positive reinforcement to reduce accidents and break the re-marking cycle.


